The Zscaler configurations required to integrate WitnessAI are:
Admin Role
Admin Account in ZIA or ZIdentity
Cloud Service API Key
Proxy Setup
Create admin role
Create an Admin Role under Administration → Administrator Role → AddAdministrator Role
Name → WitnessAI-API-Role
Policy & Components → URL categories → Custom
Custom URL Category Management → Full
Override Existing Categories → None
Zscaler Defined URL Category Management → None
Set all other scope as “None” or “View Only”, then Save
Create admin account
Create a new admin account under Administration → Administrator Management → Administrators → AddAdministrator and attach the above created admin role.
Login ID → svc_witnessai_zia
Role → WitnessAI-API-Role
Password → Set password, then Save
💡
Note: If SAML authentication is enabled for admin logins, the 'Password-Based Login' option must be enabled to override this setting and allow the use of a password.
Configure service account for ZIdentity Managed Admins
This step applies to Zscaler tenants that have been migrated to ZIdentity (Zscaler’s centralized identity service). Admin accounts migrated to ZIdentity will no longer be managed through the Admin Portal.
1. Create admin account
Go to ZIdentity Portal → Directory → Users→ Add Users
Login ID → svc_witnessai_zia@company.com
Status → Enabled
Go to Add Users → Security Settings
c. Password Option → Set By Administrator
d. Password → Enter the password
e. Confirm Password → Repeat password
2. Add User Group
Go to ZIdentity Portal → Directory → User Groups → Add User Group
f. Name → WitnessAI-API-Group
g. Assign Users → WitnessAI-API-admin
3. Attach the admin role to the group
Go to ZIdentity Portal → Administration → Entitlements → Administrative
Select → Zscaler internet Access
Click → Assign Groups, then select WitnessAI-API-Group and attach role: WitnessAI-API-Role, then Next
Verify the group and role mapping, then Assign
Create Cloud Service API Key
Go to Administration → Cloud Service API Security → Cloud Service API Key.
Check if an API key already exists.
If no key exists, click Add API Key to generate one.
💡
Note: Only one API key can be created per account.
If a key already exists, the Add API Key button will be greyed out.

Once the above configuration is completed, please handover below details to the WitnessAI account team.
Administrator Login ID
Administrator Password
API Key
Base URL: zsapi.<cloudname>.net/api/v1
Proxy Setup
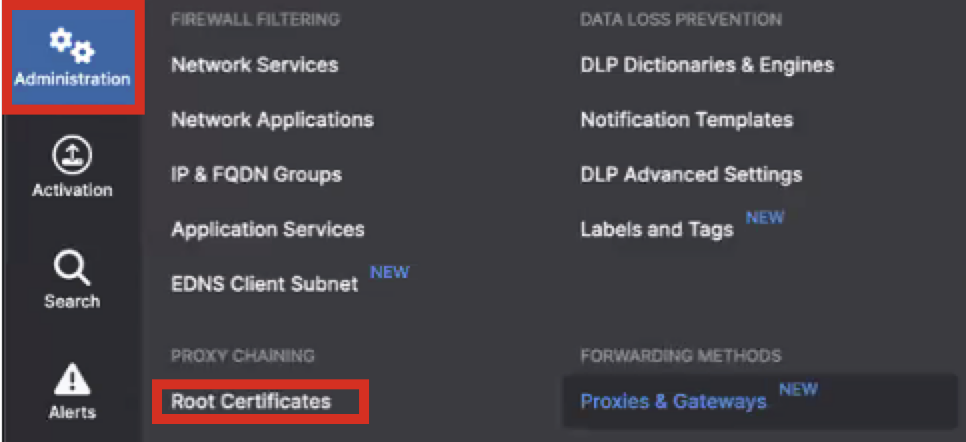
Install WitnessAI Provided Root Certificate
Click Administration → Root Certificates.
2. Click Add Root Certificate.
Name: Enter [WitnessRootCA].
Type: Enter [Proxy Chaining].
Content: Click [Choose File] and pick the WitnessAI-provided Root Certificate.
Once uploaded, click Save.
Note: WitnessAI can support a customer provided Root Certificate. However, it is recommended that administrators create a unique Root Certificate specific for the WitnessAI platform and provide it to your WitnessAI account team.
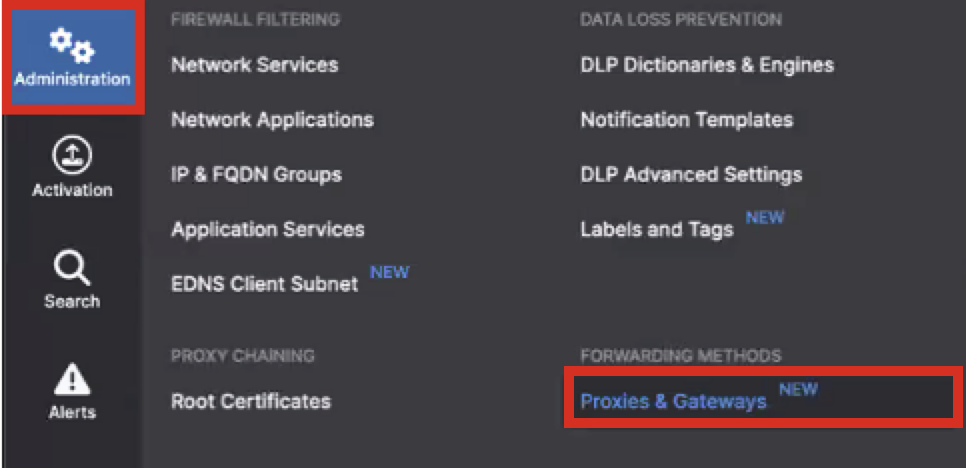
3. Select Administration → Proxies & Gateways.
Select Add Proxy.
Update the Proxy Name to [WitnessAI_NetworkConnector].
For Proxy’s Root Certificate, select the Root Certificate created in Step 2.
FQDN → connect.[tenantID].[region].witness.ai
Port → 4128
Enable the Insert-X-Authenticated-User switch.
Enable the Base64 Encoding for X-Authenticated-User value switch.
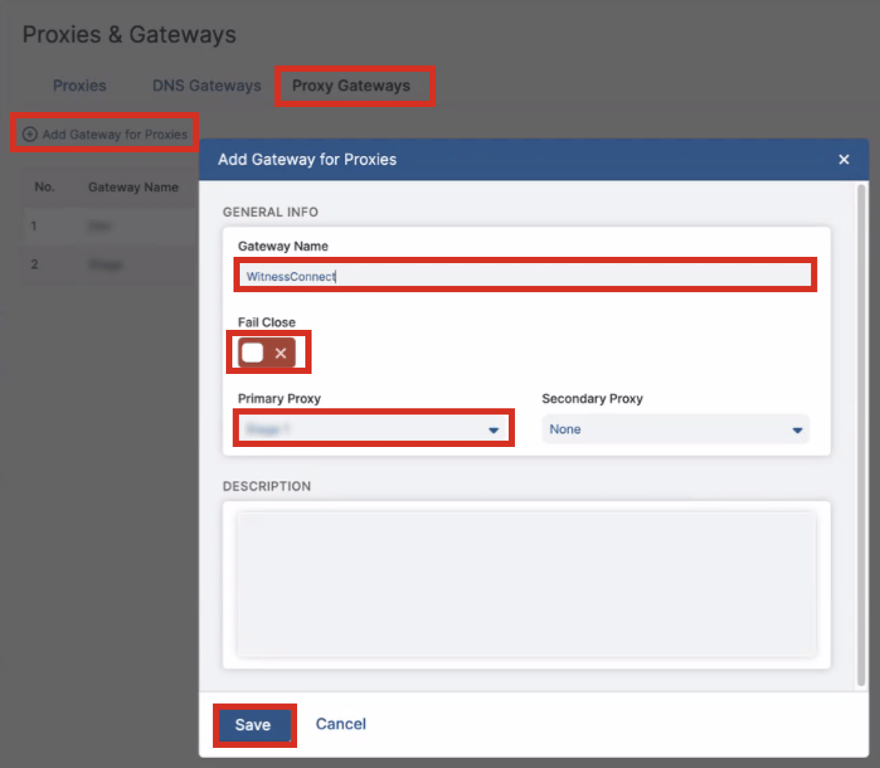
Go to Proxy Gateways
Click on + Add Gateway for Proxies
Gateway Name: Enter [WitnessConnect].
Fail Close: Click to [Disable].
Primary Proxy: Enter [WitnessAI_NetworkConnector].
Witness AI pushes 2 custom URL categories to the Zscaler portal:
WitnessFwdUrls: For use in the SSL Inspection Policy and Forwarding Control Policy.
WitnessURLList: Intended for use as an NSS feed filter for Shadow Discovery.
SSL Inspection Configuration
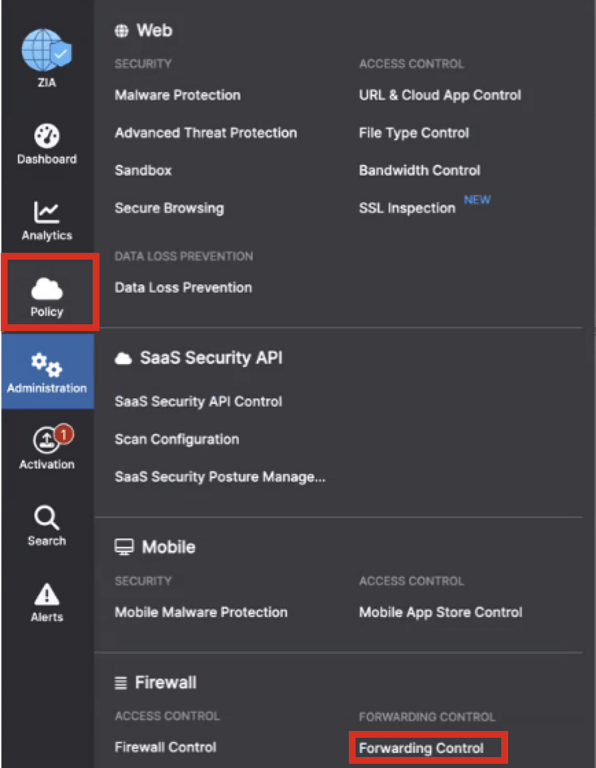
1. Navigate to Policy → SSL Inspection and click on Add SSL Inspection Rule.
2. Input the following information
Rule Order: Place it above the Generic inspection/bypass rules.
Rule Name: [WitnessAI-Inspection Rule].
Rule Status: [Enabled].
URL Categories: [WitnessFwdUrls].
Action: Inspect
Enable HTTP/2: Yes
Select: Save
Network Connector Integration
1. Select:Policy → Forwarding Control.
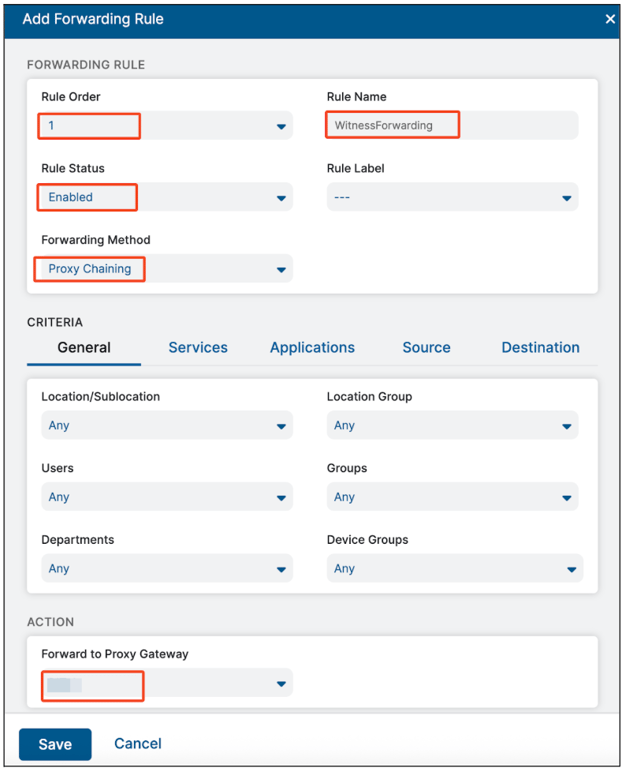
2. Select Add Forwarding Rule.
Rule Order: – Make this as high as possible.
Rule Name: Enter [WitnessForwarding].
Rule Status: Choose [Enabled].
Forwarding Method: Choose [Proxy Chaining]
General: [Define which user population will be inspected for AI].
Forward to Proxy Gateway: Choose [WitnessAI_NetworkConnector].
Destination → URL Category → WitnessFwdUrls.
Select: Save.
NSS Integration
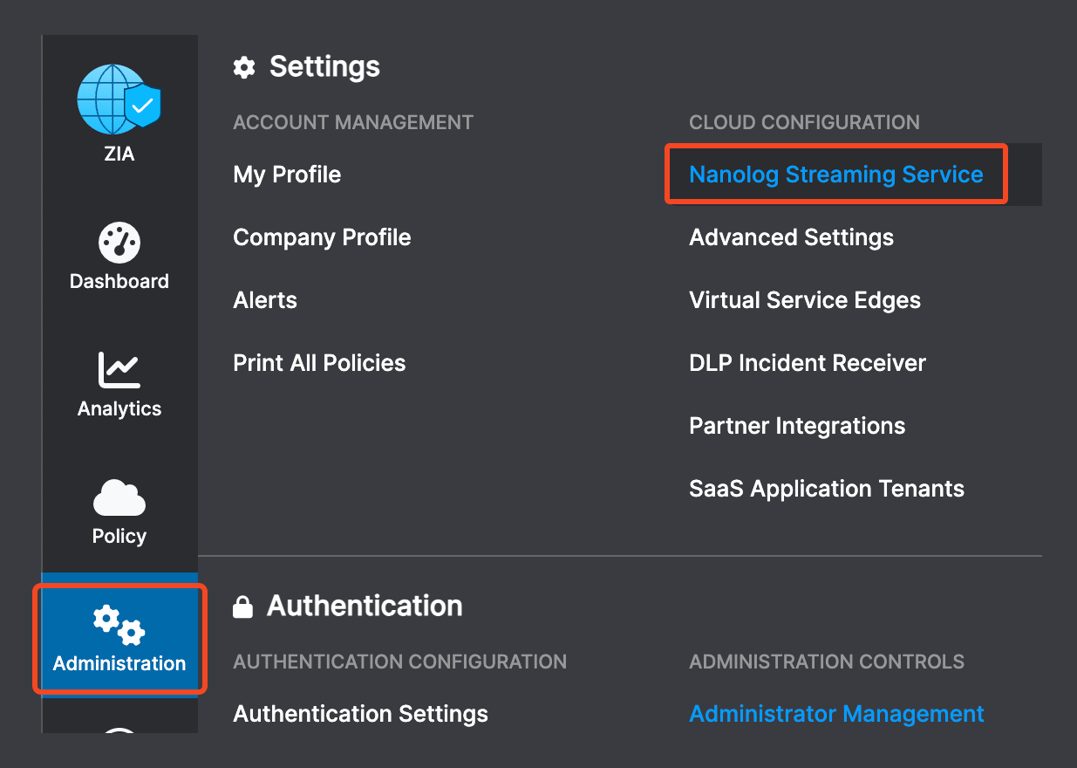
1. Select Administration → Nanolog Streaming Service
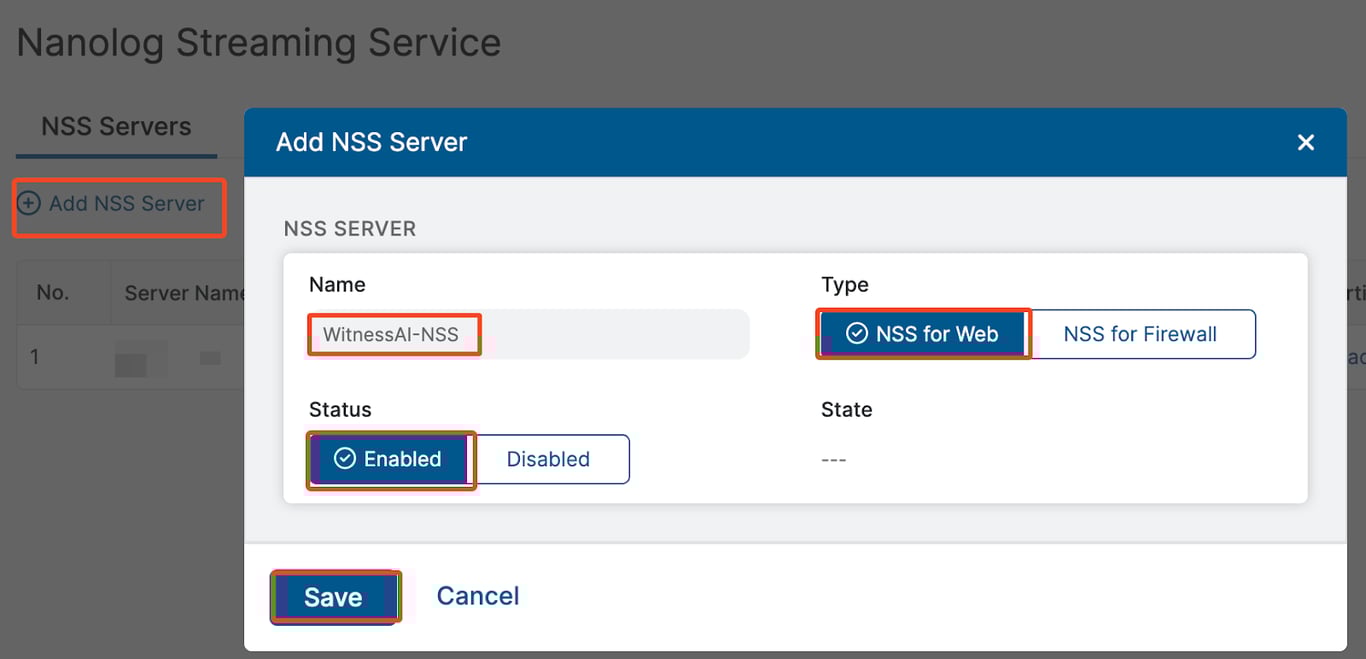
2. Add NSS Server
Name: WitnessAI-NSS
Type: Choose [NSS for Web]
Status: Enabled
Select: Save
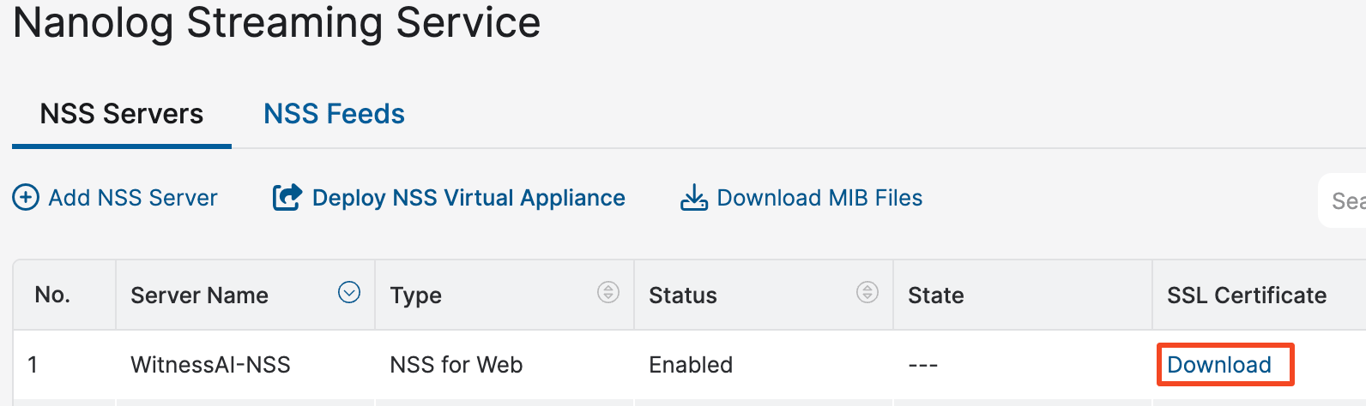
3. DownloadSSL Certificate and provide to Account team
A customer-managed NSS would result in plain text log transmission over the internet, creating security risks. To prevent this, WitnessAI hosts the NSS server on the customer’s behalf and enrolls it into the customer cloud using the exported certificate.
WitnessAI logger is designed to parse Zscaler web logs in CSV format. To enable this, NSS feeds that meet the WitnessURLList criteria should be configured to forward web logs to the logger service at logger.[tenant-id].[region].witness.ai, using TCP port 5514.
 Made with Bullet